


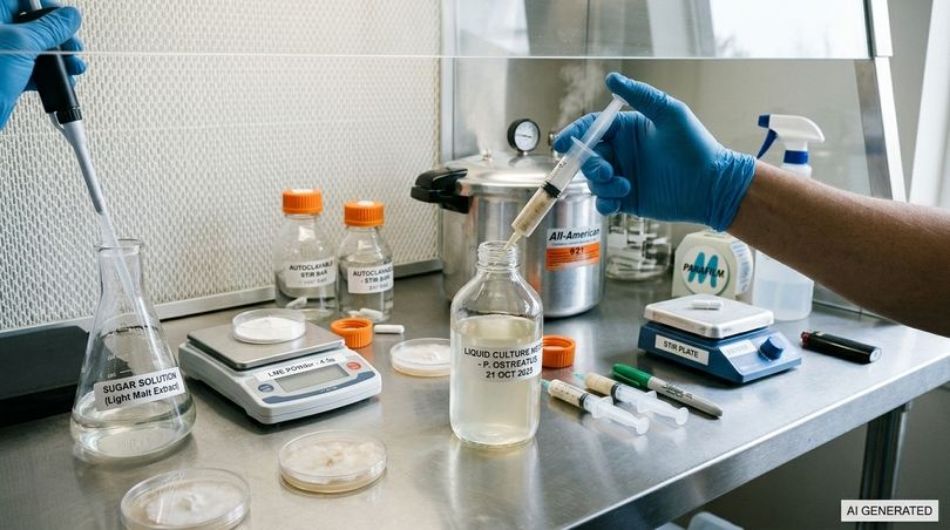
Liquid culture represents one of the most significant advances in home and professional mushroom cultivation, a technological bridge between amateur mycology and industrial production processes. If you are a mushroom enthusiast, an experienced grower, a researcher, or simply a curious hobbyist, understanding how to make a liquid culture from scratch opens the door to rapid, homogeneous, and extremely efficient mycelium multiplication.
This guide was created from the need to provide a clear, technically accurate reference rich in practical details for anyone who wishes to master this technique, transforming water and nutrients into a vital, ready-to-use inoculum. Through these pages we will explore every stage of the process, from the biological principles to the choice of materials, from preparing the medium to sterilization, through to inoculation and storage, integrating the specific products available on NaturNext.eu to offer you a complete and supported pathway.
In this article...
What a liquid culture is and why it is revolutionary
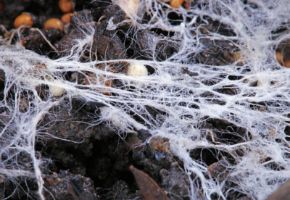
A liquid culture is essentially a suspension of fungal mycelium in an aqueous medium enriched with nutrients, typically simple sugars such as honey, dextrose, or malt extract. Unlike cultivation on solid substrate, where the mycelium expands through a physical matrix, in a liquid culture the mycelium grows in filaments and fragments freely suspended in the liquid, multiplying at a rate that can far exceed that observed on agar or grain. The biological principle is as simple as it is powerful: by providing the fungus with an aqueous environment rich in readily available energy and ensuring adequate gas exchange, exponential mycelial growth is stimulated, and within a few days it colonizes the entire volume of the container.
The history of liquid culture is rooted in twentieth-century industrial microbiology, when researchers realized that filamentous fungi could be cultivated in fermenters to produce secondary metabolites, enzymes, and biomass on a commercial scale. Today this technique has been democratized: anyone, with accessible equipment and rigorous attention to asepsis, can prepare a liquid culture in their own home laboratory. The fundamental difference compared with spore culture is that liquid culture starts from already germinated, vital mycelium, which eliminates germination times and drastically reduces the genetic variability typical of spore populations.
A particularly significant figure emerges from research on biomass production: a study on bubble column bioreactors demonstrated that the dry weight yields of four fungal species (including Pleurotus and Ganoderma) in a 2-liter system reached values between 8.02 and 14.7 g/L after only 8 days of cultivation, clearly exceeding the yields of traditional shaken flasks, which remained at 6.23–9.56 g/L. These numbers, although obtained in a research context, offer a clear indication of the intrinsic potential of liquid culture as a tool for rapid multiplication. For the home grower, this translates into the possibility of obtaining, in one or two weeks, enough inoculum to colonize dozens of grain or substrate containers, with considerable savings in terms of time and materials.
Liquid culture is not, however, a shortcut without pitfalls. Its very liquid nature makes it vulnerable to bacterial and fungal contamination, which can spread as quickly as the desired mycelium. For this reason, understanding sterilization protocols and aseptic techniques is not optional: it is the foundation on which every subsequent step is built. In this guide, each stage will be treated with due attention to critical details, so that your experience with liquid culture is not only productive but also safe and repeatable over time.
Advantages compared with spores and grain: data and comparisons
To fully understand the value of liquid culture, it is useful to place it within the landscape of fungal propagation methods, comparing it with the most widespread alternatives. Each approach has specific characteristics, and the choice depends on the grower's goals, available resources, and level of experience.
Liquid culture vs spores: speed and homogeneity
Spore culture is the most accessible starting point for those approaching mycology, but it has significant intrinsic limitations. Spores, being reproductive cells, require precise environmental conditions to germinate and, once germinated, give rise to a genetically heterogeneous population. This means that within the same culture batch, mycelia with potentially very different growth characteristics, yields, and environmental sensitivity will develop. Liquid culture, by contrast, starts from a sample of already selected, vital mycelium: what multiplies is a clonal copy of the starting fungus, with a genetic uniformity that translates into predictable growth and more consistent yields.
On a practical level, the difference in timing is remarkable. While a spore culture may require one to three weeks just to show visible signs of germination on agar, a well-prepared liquid culture inoculated with active mycelium shows signs of growth within 48–72 hours, with complete colonization of the liquid volume typically completed in 7–14 days, depending on the species and temperature. This speed is not just a matter of convenience: it means the grower can identify potential contamination early and intervene before it spreads to the entire batch.
Liquid culture vs grain: versatility and control
Colonized grain (spawn) is the traditional format used to inoculate fruiting substrate. However, producing grain spawn requires additional steps: preparing the grain, hydrating it, sterilizing it, and a colonization period that can last from two to four weeks. Liquid culture acts as a versatile intermediary: it can be used to inoculate grain with a syringe, distributing the mycelium evenly throughout the container and reducing the colonization time of the grain itself. Moreover, liquid culture can be expanded further: by taking a small aliquot from a colonized jar, new jars of liquid culture can be prepared, in a multiplication cycle that, if conducted under aseptic conditions, can be repeated several times.
An often underestimated aspect concerns the quality of the inoculum. Colonized grain, if stored too long or exposed to suboptimal temperatures, can deteriorate or exhaust its energy reserves before use. Liquid culture, when properly stored under refrigeration, maintains mycelial vitality for periods ranging from two to six months, offering operational flexibility that grain cannot guarantee. This makes it particularly suitable for those who wish to maintain a collection of strains without having to perpetually transfer cultures on agar.
Materials and equipment: the complete list
Preparing a liquid culture requires a set of materials that, taken together, constitute a small home laboratory. The good news is that many of these tools are easily available and reusable, making the initial investment accessible even to those approaching this technique for the first time. The choice of materials, however, is not neutral: every component affects the success of the process, and neglecting even a single detail can compromise the entire batch.
Containers and lids
The ideal container for a liquid culture is a borosilicate glass jar with a capacity between 250 ml and 1 liter. Borosilicate glass is preferable to ordinary glass because it better withstands the thermal shocks of pressure cooker sterilization, reducing the risk of breakage. The lid must be equipped with two essential elements: an injection port (a silicone pad that allows a needle to be inserted without compromising sterility) and a hydrophobic filter for gas exchange. This filter allows oxygen to enter and carbon dioxide to exit, but blocks the passage of contaminating particles and unwanted spores. DIY solutions, such as a drilled lid with a syringe filter disc and a silicone stopper, can work, but the precision and reliability of lids designed specifically for this purpose are difficult to replicate.
Commercially, it is possible to find jars and lids designed for liquid cultivation already loaded with liquid mycelium of selected species. These syringes represent an excellent starting point for those who wish to test the technique without having to prepare a culture from scratch, or they constitute the inoculum material for one's first homemade liquid culture.
Sterilization equipment
The pressure cooker is the heart of the sterilization process. For a reliable liquid culture, a cooker capable of reaching and maintaining a pressure of 15 psi (about 1 bar), corresponding to a temperature of 121°C, is required. Good-quality domestic pressure cookers, such as those used for canning, generally meet this requirement, but it is essential to verify that the pressure gauge works correctly and that the gasket is intact. Pressure sterilization is the only method that guarantees the elimination of heat-resistant bacterial spores, which survive simple boiling.
Tools for inoculation and handling
Inoculation requires sterile needles and syringes. Needles of 18–22 gauge are suitable for most applications, but for drawing from jars with silicone stoppers, a slightly larger gauge needle is preferable to reduce mechanical effort. The syringe must be disposable and sterile, and the needle must be flamed or disinfected with 70% alcohol immediately before use. For handling the jars during inoculation, a Still Air Box (SAB) is essential, a transparent plastic box with two arm holes, which creates a relatively stagnant air volume and reduces the risk that contaminating particles in suspension reach the inoculation point. A laminar flow hood represents the professional solution, but its cost makes it accessible only to those who practice this activity continuously.
The liquid culture recipe: doses and variations
The composition of the culture medium is a determining factor for growth speed, mycelial density, and ease of spotting contamination. There are numerous recipes, ranging from simple water and honey solutions to more complex formulations with malt extract and peptone. The choice depends on the fungal species, the grower's goals, and the availability of ingredients.
The basic recipe: honey and water
The most accessible and widely used formula involves the use of honey as a sugar source. For 500 ml of distilled or demineralized water, about 10 grams of honey are used, equal to a ratio of 2%. This ratio is considered optimal for most species: concentrations above 4% tend to exert excessive osmotic pressure on the mycelium, slowing its growth and at the same time favoring the development of contaminating bacteria. Honey also provides a modest amount of micronutrients and natural antimicrobial compounds, which can help slow the proliferation of some contaminants in the early stages.
One limitation of honey is its opacity: the resulting solution is darker and less transparent than those obtained with refined sugars, making early detection of contamination signs more difficult. For this reason, many growers prefer to use a combination of dextrose (grape sugar) and light malt extract, which produces a clear solution and allows the development of hyphae and the possible appearance of anomalous turbidity to be observed clearly.
The advanced recipe: dextrose and malt extract
For a more professional and reproducible liquid culture, the combination of dextrose and light malt extract (DLME) represents the reference standard. The typical proportion provides 10 grams of DLME per 500 ml of water, with a dextrose/malt extract ratio that can vary depending on the target species. Dextrose provides immediately available energy and keeps the solution clear, while malt extract provides more complex sugars, amino acids, vitamins, and minerals that support more vigorous growth and greater biomass density. The addition of a small amount of peptone (0.2–0.5 g/L) can further accelerate growth in the most demanding species, providing a readily assimilable nitrogen source.
Regardless of the recipe chosen, the water used must be of controlled quality. Tap water, even if potable, contains chlorine, minerals, and microorganisms that can interfere with the culture. Distilled or demineralized water is preferable, but even bottled oligomineral water can be used if previously sterilized. Under no circumstances should untreated water be used, since the contaminants present in it would find an ideal environment for multiplying in the culture medium.
| Ingredient | Basic recipe | Advanced recipe | Balanced recipe |
|---|---|---|---|
| Water | 500 ml | 500 ml | 500 ml |
| Honey | 10 g | - | 5 g |
| Dextrose | - | 1.5 g | 1 g |
| Light malt extract | - | 5 g | 3 g |
| Peptone (optional) | - | 0.1–0.25 g | 0.1 g |
| Solution clarity | Low | High | Medium-high |
| Suitable for | First trials | Experienced growers | General use |
Sterilization: the critical step
If there is one step that determines the success or failure of a liquid culture, it is sterilization. The culture medium, rich in sugars and nutrients, is fertile ground not only for the desired mycelium but also for competing bacteria, yeasts, and molds. Even a single bacterial spore that survives sterilization can multiply rapidly and overwhelm the mycelium, turning a clear jar into a cloudy, unusable suspension within a few days. Sterilization must therefore be conducted with precise parameters and without shortcuts.
Sterilization parameters
The reference temperature is 121°C at 15 psi pressure. Times vary depending on volume: for 250 ml jars, 20–25 minutes are sufficient; for 500 ml volumes, the time rises to 30–35 minutes; for 1-liter jars, 40–45 minutes are required. These times must be counted from the moment the cooker reaches the target pressure, not from when the stove is turned on. It is also essential that steam circulates freely around the jars: containers must not be stacked in a way that obstructs steam passage, and the water at the bottom of the cooker must be sufficient to generate steam for the entire duration of the treatment without running out.
A frequently overlooked precaution concerns protecting the lid filter. During sterilization, water vapor can pass through the hydrophobic filter and wet it, compromising its functionality and creating a liquid bridge through which contaminants can penetrate once the jar has cooled. To avoid this problem, a sheet of aluminum foil is used to wrap the lid and filter, to be removed only at the time of inoculation. This simple precaution, recommended in the most rigorous protocols, drastically reduces the risk of post-sterilization contamination.
Cooling and inspection
At the end of sterilization, the jars must cool slowly to room temperature before inoculation. Opening the cooker prematurely, while the contents are still under pressure, can cause violent escapes of boiling liquid and breakage of the jars. Once atmospheric pressure has been reached, the jars can be carefully removed and left to cool on a clean surface. Before inoculation, it is good practice to verify that the liquid is clear and shows no anomalous sediments or signs of coagulation, which could indicate incomplete sterilization or an unwanted reaction between the ingredients.
Inoculation: techniques and precautions
Inoculation is the moment when the mycelium is introduced into the sterile medium. It is the step in which contamination, if present in the environment or on the tools, has the greatest probability of entering the system. For this reason, every action must be carried out with awareness and by following a proven sequence.
Preparing the environment and tools
Before proceeding, the work area must be cleaned and disinfected with 70% alcohol or a hypochlorite-based product. If a Still Air Box is used, the inner walls must be sprayed with disinfectant and left to dry. Tools, including needles, syringes, and scissors, must be sterilized: disposable needles and syringes are already sterile in the package, but the needle must be flamed before use to eliminate any surface contaminants acquired during handling. 70% alcohol is preferable to 90% alcohol for surface disinfection, since the presence of water improves its penetration through the cell membranes of microorganisms.
Inoculation procedure
The mycelium source can be a commercial liquid culture syringe, a colonized agar fragment, or a small aliquot taken from another liquid culture in active growth phase. In the case of a syringe, the needle is inserted through the lid's injection port and an amount between 0.5 and 2 ml of suspension is injected into the jar. For a 500 ml liquid culture, 1 ml of inoculum is generally sufficient: larger amounts slightly accelerate colonization but also increase the risk of introducing contaminants if the source is not perfectly clean. After injection, the jar is gently swirled with a rotating motion to distribute the mycelium in the medium, avoiding shaking it too vigorously, which could cause excessive foaming or leakage of liquid through the filter.
If inoculation is from agar, a hole is made in the lid (if not already present) and a small fragment of colonized agar is introduced with the aid of sterile tweezers. This technique, although requiring greater manual skill, allows the healthiest and most vigorous mycelium to be visually selected from the mother plate, further reducing the risk of introducing latent contamination.
Growth and monitoring: what to observe
After inoculation, the liquid culture jar must be placed in a warm, dark environment. The ideal temperature for most species cultivated at hobbyist and semi-professional level is between 20 and 25°C. Lower temperatures slow growth, while higher temperatures, especially if associated with unfavorable pH, favor bacteria. Dark incubation is not strictly necessary for all species, but during the mycelial multiplication phase, light provides no benefits and can contribute to activating unwanted metabolic pathways.
Signs of healthy growth
A healthy liquid culture is recognized by a series of visual indicators. 48–72 hours after inoculation, the appearance of small white masses, similar to tufts or thin filaments, can be observed floating in the liquid. As the days pass, these masses increase in number and size, until they form a dense, milky suspension. The liquid remains clear or slightly opalescent, and when the jar is gently swirled the masses disperse easily. A faint, sweet, slightly fungal odor is normal, while acidic, putrid, or alcoholic odors indicate the presence of bacterial contamination.
Signs of contamination
Bacterial contamination typically manifests as diffuse turbidity that does not dissolve when swirled, accompanied by an unpleasant odor and, sometimes, the formation of a film on the surface. Bacteria multiply much faster than mycelium and can make the liquid cloudy within 24–48 hours. Fungal contamination (molds), on the other hand, appears as colonies of unusual colors: green, pink, black, or gray. Any color other than the white or light cream of the desired mycelium is an alarm signal. In the presence of these signs, the jar must be immediately isolated and its contents disposed of: there is no reliable way to recover a contaminated liquid culture, and attempting to salvage it exposes the other jars to unacceptable risk.
Storage and reactivation
A well-prepared, fully colonized liquid culture can be stored for weeks or months, depending on storage conditions and species. Refrigeration is the most effective method for slowing the mycelium's metabolism without killing it, allowing a supply of inoculum to be kept ready for use for subsequent inoculations.
Storage parameters
The ideal storage temperature is between 2 and 4°C, achievable on the middle shelf or toward the back of the refrigerator, away from the door and walls, where temperature fluctuations are smaller. The jar must be protected from light, preferably wrapped in a dark cloth or kept in an opaque container, and kept upright to prevent leakage through the filter. Under these conditions, most liquid cultures remain viable for 2–6 months, with the first two months representing the period of maximum vitality and vigor. Some tropical species, such as Pleurotus djamor, tolerate cold less well and may require higher storage temperatures, around 15°C.
Reactivation before use
When a liquid culture is taken from the refrigerator, the mycelium is in a state of metabolic dormancy. To reactivate it, the jar must be left at room temperature for 12–24 hours before use, so that the hyphae gradually resume their activity. Before inoculation, the jar should be gently swirled to redistribute the mycelium, which tends to settle to the bottom during storage. If after reactivation the liquid still appears clear and the mycelial masses disperse easily, the culture is ready to be used. If signs of deterioration are noticed, such as anomalous odors or suspicious coloration, it is safer to discard the jar and prepare a new one.
Common mistakes and how to avoid them
Literature and the shared experience of growers highlight a series of recurring mistakes that compromise the success of liquid culture. Recognizing them in advance is the most effective way to avoid them.
Medium too rich
One of the most frequent mistakes is adding an excessive amount of sugars. Concentrations above 4% exert osmotic pressure that damages the mycelium and, above all, create an environment favorable to bacterial proliferation. The 2% rule is a safe starting point for most species, and there is no benefit in exceeding it. A more dilute medium requires slightly longer colonization times but offers greater stability and lower susceptibility to contamination.
Insufficient or rushed sterilization
Reducing sterilization times or using cookers that do not reach 15 psi are mistakes that are inevitably paid for. Heat-resistant bacterial spores, such as those of the genus Bacillus, survive temperatures below 121°C and germinate in the culture medium, often before the mycelium has a chance to establish itself. Investing in an adequate pressure cooker and respecting the recommended times is a choice that pays off with every successful batch.
Inadequate inoculation environment
Working in a kitchen or in a domestic environment without protections is one of the most common causes of contamination. Dust particles, air movements, and the presence of microorganisms on surfaces make the introduction of contaminants practically inevitable. A Still Air Box, even one built DIY-style from a transparent plastic box, represents a significant improvement over working in the open air, and its cost is amply justified by the reduction in losses.
Lack of quality controls
Relying exclusively on visual appearance is a mistake that can have serious consequences. A liquid culture can appear clear and yet contain a latent bacterial load that will only manifest after inoculation into grain, when the damage is already done. Agar control, that is, inoculating a small aliquot onto an agar plate to verify the absence of contaminating colonies, is the most effective safeguard before using a liquid culture for production. This additional step requires a few days but can save weeks of work and wasted materials.
Frequently asked questions (FAQ)
| Question |
|---|
How long does a liquid culture take to fully colonize the jar?Times vary depending on species, temperature, and inoculum amount. Under optimal conditions (20–25°C), most common species show signs of growth within 48–72 hours and complete colonization in 7–14 days. Slower species, such as Reishi, may require up to three weeks. |
Can I use supermarket honey to prepare the liquid culture?Yes, commercial honey is suitable, provided it contains no preservatives or additives. Organic, unpasteurized honey is preferable because it retains a greater variety of micronutrients, but pasteurized honey also works. Avoid flavored honey or honey with additions. |
Can liquid culture be stored at room temperature?Yes, but for short periods (days) and only if the jar is fully colonized. At room temperature the mycelium continues to grow and consumes nutrients, exhausting the medium and increasing the risk of contamination. For storage longer than one week, refrigeration is strongly recommended. |
Can I freeze liquid culture to store it longer?No. Freezing damages the mycelium's cell membranes and causes its death. Refrigeration at 2–4°C is the only recommended long-term storage method for liquid cultures. |
How much inoculum should I use for a 500 ml jar?For a 500 ml liquid culture, 1 ml of mycelium suspension from a syringe or another liquid culture is generally sufficient. Larger amounts (up to 2–3 ml) slightly accelerate colonization but increase the risk of introducing contaminants if the source is not perfectly sterile. |
Why did my liquid culture become cloudy after a few days?Diffuse turbidity that does not dissolve when swirled is almost always a sign of bacterial contamination. The most common causes are insufficient sterilization, inoculation in a non-sterile environment, or a culture medium too rich in sugars. The jar must be discarded and the process repeated with greater attention to asepsis. |
Can I prepare a liquid culture starting from a commercial syringe?Yes, in fact it is one of the safest methods to start with. The liquid mycelium syringes available on NaturNext.eu are already loaded with selected strains and can be used directly to inoculate the sterile medium prepared at home. This reduces the risk of contamination associated with preparation from spores. |
Is light necessary during liquid culture growth?No, the mycelial multiplication phase in liquid does not benefit from light and can be conducted in darkness. Light becomes relevant in later stages, when fruiting is to be induced. During liquid culture growth, darkness or very dim light is preferable to avoid unnecessary metabolic stimuli. |
Liquid culture as a fundamental skill for the modern grower
Liquid culture is not simply one technique among many in the mushroom grower's repertoire: it is a cross-cutting skill that combines microbiology, artisanal precision, and strategic planning. As we have seen throughout this guide, mastering liquid culture means gaining control over every stage of the propagation cycle, from strain selection to mycelial multiplication, through to storing a ready-to-use supply of inoculum. This control translates into concrete advantages: reduced colonization times, genetic uniformity of the mycelium, less dependence on external suppliers, and a capacity for production expansion that, with traditional methods, would require considerably greater resources and space. Liquid culture represents, ultimately, the meeting point between the hobbyist's curiosity and the researcher's rigor, a bridge that allows anyone, with dedication and attention to detail, to approach practices once reserved for professional laboratories.
It is important to emphasize that success with liquid culture does not depend on the complexity of the equipment, but on the discipline with which the principles of asepsis are applied at every single step. A reliable pressure cooker, a carefully built Still Air Box, a balanced recipe, and rigorous tool hygiene are the elements that, together, determine the success of the process. The most common mistakes (medium too rich, rushed sterilization, inadequate inoculation environment) are all avoidable with a little preparation and with the awareness that liquid culture does not forgive shortcuts. At the same time, the satisfaction of watching a clear jar transform, day after day, into a dense and vital suspension of mycelium is one of the most rewarding experiences that home mycology can offer.
Whether you are taking your first steps in mushroom cultivation or trying to optimize an already consolidated process, liquid culture offers a path of technical and personal growth that deserves to be explored fully. Nature, as always, rewards those who observe it with patience and study it with rigor: and liquid culture is, perhaps, one of its most fascinating gateways.
This article was developed with the support of artificial intelligence and subsequently reviewed, corrected, and validated by the technical team of NaturNext.eu, which guarantees its reliability and compliance with official sources.
The fungal kingdom is a constantly evolving universe, with new scientific discoveries emerging every year about their extraordinary benefits for gut health and general well-being. From now on, when you see a mushroom, you will no longer think only of its flavor or appearance, but of all the therapeutic potential contained in its fibers and bioactive compounds. ✉️ Stay connected - Subscribe to our newsletter to receive the latest studies on: Nature offers us extraordinary tools to take care of our health. Mushrooms, with their unique balance between nutrition and medicine, represent a fascinating frontier that we are only beginning to explore. Keep following us to discover how these extraordinary organisms can transform your approach to well-being.Continue your journey into the world of mushrooms