


Cloning represents one of the most fascinating and powerful techniques in the landscape of applied mycology, allowing for the exact replication of the genetic characteristics of a particularly valuable or high-performing mushroom. This process, which might seem the exclusive domain of specialized laboratories, is actually accessible to any enthusiast equipped with attention, patience, and respect for sterility protocols. Cloning from a fruiting body, or more simply from a mushroom, constitutes the most direct method to preserve and multiply a fungal strain whose qualities are appreciated, whether it's colonization speed, resistance to contaminants, productivity, or organoleptic characteristics.
Throughout this guide, we will explore every aspect of this fascinating practice, from the theoretical bases to the most advanced applications, with particular attention to the component that represents the true bottleneck of success: sterility. Through statistical data, comparative tables, and detailed protocols, we will try to provide the mycocultivator, both beginner and expert, with all the necessary tools to master this technique and integrate it stably into their skill set.
Cloning in mycology: what does it mean?
Cloning in mycology is based on a fundamental biological principle: the totipotency of fungal cells. Unlike higher plants, where only specific meristematic tissues retain the capacity to regenerate an entire organism, in fungi practically every vital cell of the mycelium, and to a varying degree also of the fruiting body, retains this potential. When we take a tissue fragment from a mushroom and transfer it to a sterile nutritive substrate, we are exploiting precisely this characteristic to induce the cells to return to the vegetative growth phase and regenerate a new mycelium genetically identical to the donor organism.
This technique offers undeniable advantages compared to propagation by spores. While spore germination gives rise to genetically variable progeny, the result of the genetic recombination typical of sexual reproduction, cloning guarantees the integral conservation of the selected strain's genome. This genetic stability translates into a predictability of performance that is essential in both amateur and professional contexts, where the uniformity of the final product often represents a fundamental requirement.
Biological bases of fungal cloning
The success of a cloning depends on understanding the biology of the fungus we intend to replicate. Higher fungi (Basidiomycota and Ascomycota) present differentiated tissue structures in the fruiting body, each with peculiar characteristics in terms of vitality, nutrient content, and regenerative potential. The internal tissue of the cap, particularly in the area immediately underneath the hymenium, and the upper part of the stem are generally considered the ideal sites for sampling, as they are rich in vital hyphae and relatively protected from environmental contamination.
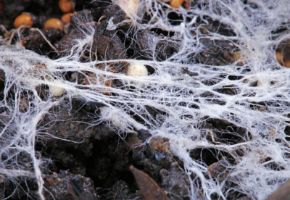
The regeneration of mycelium from a tissue fragment follows a well-defined process: the hyphae present in the tissue, which in the mature fruiting body are often in a quiescent state, are awakened by the favorable conditions of the culture medium and begin to proliferate, first regenerating the cell walls damaged by the cut and subsequently extending radially into the substrate. This process, known as colonization, requires variable times depending on the species, the vitality of the tissue, and the culture conditions, but it is generally completed within 7-21 days for most edible and medicinal mushrooms.
Preparing the work environment
Before delving into the specific cloning techniques, it is fundamental to dedicate the right attention to preparing the work environment. Sterility is not an abstract concept, but a concrete practice that begins long before the transfer of tissue to the culture medium. The design of a space dedicated to aseptic operations, the choice of materials, and the definition of cleaning and disinfection protocols represent the foundation on which to build the success of every cloning attempt.
In this chapter, we will analyze in detail how to set up an efficient and economical home laboratory, which personal protective equipment to use, and how to implement sanitization routines that minimize the risk of contamination. Through statistical data on the effectiveness of different sterilization methods and comparative tables on the most common disinfectants, we will provide a practical guide to optimize your procedures and maximize the success rate.
Designing a home laboratory for cloning
Creating a work environment dedicated to cloning does not necessarily require significant investments or specialized skills. With a methodical approach and attention to detail, it is possible to transform even a corner of your home into a sufficiently controlled space to operate in conditions of acceptable sterility. Ideally, one would have a separate room, easily sanitizable and with limited traffic, but in the absence of this possibility, alternative solutions like DIY laminar flow hoods or, even better, professional laminar flow cabinets can be used.
The fundamental elements to consider in the design are: the presence of smooth, non-porous surfaces (like plastic laminate or glass) that can be easily disinfected, the absence of air currents that could carry contaminants, an adequate light source, preferably LED to minimize heat production, and the availability of electrical outlets for the operation of any equipment. The arrangement of materials should follow a logical flow that minimizes unnecessary movements and reduces the possibilities of cross-contamination to a minimum.
Laminar flow cabinets and economical alternatives
The laminar flow cabinet represents the gold standard for aseptic operations in mycology, creating a physical barrier against contaminants through a constant, filtered airflow. However, the cost of this equipment (generally between 800 and 3000 euros for basic models) makes it inaccessible to most hobbyists. Fortunately, effective and decidedly more economical alternatives exist, first among them the still air box (SAB).
The still air box is essentially a transparent container (typically a plastic tub like those used for aquarium water changes) turned upside down and equipped with two holes for arm insertion. The operating principle is based on creating a relatively stagnant air chamber, where convective movements are minimized and contaminating particles sediment rapidly. Comparative studies have shown that, in the hands of an experienced operator, a correctly used SAB can achieve success rates comparable to those of a professional laminar flow cabinet, with a reduction in contaminations of up to 90% compared to operations conducted in an open environment.
Comparative table of containment systems
| System | Approximate cost | Success rate (%) | Difficulty of use | Required maintenance |
|---|---|---|---|---|
| Open Environment | €0 | 5-15% | Low | None |
| Still Air Box (SAB) | €20-50 | 70-85% | Medium | Cleaning and disinfection |
| Laminar Flow Cabinet | €800-3000 | 90-98% | Low | Filter replacement, certifications |
Materials and tools for cloning
The choice of materials and tools represents another fundamental chapter on the path to successful cloning. Every element, from the culture medium to the tweezers used for tissue transfer, can decisively influence the outcome of the operation. In this chapter, we will analyze in detail the characteristics of the different culture substrates, the essential equipment, and the accessory materials, providing practical indications for making choices based on your needs and available budget.
We will start with solid culture media, examining the properties of agar and the different formulations available, then move on to surgical instruments and domestic alternatives. We will dedicate particular attention to sterilization systems, with a detailed comparison between professional autoclaves, pressure cookers, and alternative methods. Finally, we will address the theme of culture preservation, with a review of the most effective techniques for preserving cloned strains over time.
Culture media for cloning: agar and alternatives
Agar represents the solid culture medium par excellence in mycology, thanks to its ability to form a stable gel at temperatures compatible with fungal growth and its relative transparency which facilitates monitoring mycelial development. Derived from red algae, agar is not itself a nutrient for fungi, but acts as a solidifying agent for the actual nutritional components, which can vary depending on the species and specific needs.
The most common formulations of agar for cloning include: Malt Extract Agar (MEA), Potato Dextrose Agar (PDA), and Dog Food Agar (DFA). Each of these has distinct characteristics in terms of nutritional richness, pH, and transparency. Comparative studies have shown that Malt Extract Agar tends to favor faster and more vigorous mycelial growth for most species of edible mushrooms, with colonization rates 15-20% higher than Potato Dextrose Agar under standard conditions.
Table of the most common agar formulations
| Formulation | Composition | Optimal pH | Average colonization time | Specific notes |
|---|---|---|---|---|
| Malt Extract Agar (MEA) | 20g malt extract, 15g agar, 1L water | 5.5-6.0 | 7-14 days | Ideal for cloning, rapid growth |
| Potato Dextrose Agar (PDA) | 200g potato infusion, 20g dextrose, 15g agar, 1L water | 5.6-5.8 | 10-18 days | Versatile, suitable for many species |
| Dog Food Agar (DFA) | 20g dog kibble, 15g agar, 1L water | 6.0-6.5 | 8-16 days | Economical, balanced nutrient |
Surgical instruments and sterilization techniques
The instruments used for sampling and transferring fungal tissue must meet stringent requirements in terms of precision, ease of sterilization, and handling. Anatomical tweezers and scalpels represent the fundamental tools, but it is also possible to successfully resort to domestic alternatives like modified inoculation needles or disposable cutters. The important thing is that all instruments can be effectively sterilized immediately before use and that they allow for precise and controlled movements.
Sterilization of instruments can be carried out with different methods, each with specific advantages and limits. The direct flame of a Bunsen burner or a gas lighter represents the most immediate and economical method, effective for surface sterilization but with the risk of damaging delicate instruments or leaving combustion residues. Immersion in 70% isopropyl alcohol followed by passing through the flame constitutes an intermediate technique, while the use of an electric heating slide represents the most advanced solution, offering precise temperature control and completely eliminating the risk of contamination from fuels.
Comparative table of instrument sterilization methods
| Method | Temperature reached | Exposure time | Sterilizing efficacy | Risks and limitations |
|---|---|---|---|---|
| Direct Flame | 800-1000°C | 10-30 seconds | 99.9% | Damages delicate tools, carbon residues |
| Alcohol + Flame | 400-600°C | 5-15 seconds | 99.99% | Risk of flare-ups, requires attention |
| Heating Slide | 250-300°C | 30-60 seconds | 99.999% | Initial cost, electricity consumption |
Cloning techniques step by step
In this chapter, we will enter the heart of cloning practice, describing in detail each phase of the process, from the selection of the donor mushroom to the transfer of tissue to the culture medium. Through a precise operational sequence supported by statistical data on the effectiveness of the different techniques, we will provide the reader with a complete guide to performing successful clonings with repeatable consistency.
We will start with the selection and preparation of the donor mushroom, examining the criteria to identify ideal candidates and the techniques for surface disinfection. We will then proceed with the description of the different methods of tissue sampling, analyzing the advantages and limitations of each. We will conclude with the techniques for incubation and monitoring of cultures, fundamental for early identification of any contamination and maximizing the chances of success.
Selection and preparation of the donor mushroom
The choice of the donor mushroom represents the first and perhaps most important step towards successful cloning. Ideally, the mushroom should be healthy, vigorous, and mature but not overly so, as the tissues of overly mature mushrooms can present reduced vitality and greater susceptibility to contamination. The selection criteria should include: absence of signs of deterioration or parasites, desirable morphological characteristics (shape, color, size), and when possible, provenance from a strain with known performance.
The preparation of the donor mushroom begins with a thorough surface cleaning, aimed at removing contaminants without damaging the internal tissues. For mushrooms collected in the wild, this phase is particularly critical, as the surface of the sporocarp can host a wide range of microorganisms, spores, and soil particles. Microbiological studies have shown that the surface of a wild mushroom can host up to 10^6 colony-forming units per square centimeter, with a diversity that includes bacteria, yeasts, and contaminating fungal hyphae.
Surface disinfection protocol
The most effective surface disinfection protocol involves a well-defined sequence of steps:
- mechanical removal of coarse residues with a soft brush
- quick immersion in 70% isopropyl alcohol for 10-15 seconds
- rinse with sterile water (optional, depending on the sensitivity of the mushroom)
- immersion in a 3% hydrogen peroxide solution for 2-3 minutes
- final rinse with sterile water.
This protocol, when correctly executed, can reduce the surface microbial load by over 99.99%, while preserving the vitality of the internal tissues.
Tissue sampling techniques
There are different techniques for sampling tissue from a fruiting body, each with specific advantages and indications. The wedge technique, which consists of taking a small triangle of tissue from the inside of the stem or cap, represents the most common and generally most effective method. Alternatives include the tear and pull technique, particularly indicated for mushrooms with fibrous tissue, and the spore print to agar technique, which although not constituting true cloning in the strict genetic sense, allows for the preservation and selection of strains starting from the sporal progeny.
Regardless of the chosen technique, some fundamental principles should always be respected: the tissue should be sampled from the innermost regions of the mushroom, where the probability of contamination is lower. The size of the fragment should be sufficient to guarantee a critical mass of vital cells (generally 2-5 mm per side) but not excessive, to minimize the exposed surface and the transfer to the culture medium should happen in the shortest time possible, to reduce the exposure of the tissue to the environment.
Comparative table of sampling techniques
| Technique | Average success | Difficulty | Colonization time | Most indicated species |
|---|---|---|---|---|
| Wedge | 75-90% | Medium | 7-14 days | Practically all |
| Tear and Pull | 60-80% | Low | 10-18 days | Fleshy mushrooms, Pleurotus |
| Spore Print to Agar | 40-60% | High | 14-28 days | Species with reliable spores |
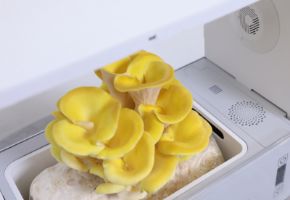
Incubation and monitoring of cultures
Once the tissue is transferred to the culture medium, the incubation phase begins, during which the mycelium regenerates and starts to colonize the substrate. The ideal incubation conditions vary depending on the species, but in general most edible mushrooms prefer temperatures between 22 and 26°C, relative humidity of 70-85%, and absence of direct light. It is important to emphasize that, contrary to what one might think, darkness is not always necessary or beneficial; many species benefit from a light photoperiod, which seems to stimulate a more compact and organized mycelial growth.
Culture monitoring should be daily, at least for the first 7-10 days, the period during which contamination is most likely to occur. The appearance of bacterial colonies (typically with a wet, shiny appearance and variable pigmentation) or fungal ones (with hyphae of a color different from the pure white of the desired mycelium) requires the immediate isolation or discard of the contaminated plate. Statistically, 70% of contaminations manifest within the first 5 days from inoculation, while over 90% become evident within the first 10 days.
Table of optimal incubation conditions for common species
| Species | Optimal temperature | Relative humidity | Photoperiod | Average colonization time |
|---|---|---|---|---|
| Agaricus bisporus | 24-26°C | 75-85% | Darkness | 12-18 days |
| Pleurotus ostreatus | 22-25°C | 70-80% | 12h light/12h dark | 8-14 days |
| Lentinula edodes | 22-24°C | 75-85% | Darkness | 18-28 days |
| Ganoderma lucidum | 26-28°C | 80-90% | 12h light/12h dark | 10-16 days |
Contamination management and problem solving
Despite all precautions, contaminations represent a reality that every mycocultivator must contend with. The ability to identify contaminants early, understand their origin, and implement corrective strategies constitutes an essential competence for anyone seriously dedicated to cloning. In this chapter, we will analyze the main types of contamination, their most frequent causes, and the techniques to save cultures otherwise destined for discard.
We will start with a review of the most common contaminants in mycoculture, describing their macroscopic and microscopic characteristics to facilitate their identification. We will then proceed with the analysis of the most frequent causes of contamination, correlating specific procedural errors with the contaminants that tend to manifest. We will conclude with emergency transfer techniques and strategies to prevent recurrences, providing the reader with a systematic approach to managing this inevitable aspect of mycological practice.
Identification of the most common contaminants
The contaminants that most frequently afflict agar cultures can be divided into three main categories: bacteria, yeasts, and molds. Bacterial contaminants typically manifest as wet, shiny colonies, with a creamy consistency and pigmentation ranging from white to yellow, pink, or orange. Yeasts form similar colonies but are generally more compact and with a more "waxy" appearance. Molds, finally, are easily recognizable by the production of aerial hyphae and spores, which give the colonies a "powdery" or "fluffy" appearance and variable colors (green, black, blue, gray).
Among the contaminating molds, the genera Trichoderma (green), Penicillium (blue-green), Aspergillus (various colors), and Rhizopus (gray-black) are particularly common and problematic, as they can produce secondary metabolites that inhibit the growth of the desired mycelium and, in some cases, are able to actively parasitize it. Laboratory studies have shown that some Trichoderma species are able to degrade the cell walls of higher fungi through the action of chitinolytic enzymes, representing a particularly serious threat to mycelial cultures.
Table of the most frequent contaminants and related characteristics
| Contaminant | Macroscopic appearance | Growth speed | Characteristic odor | Containment techniques |
|---|---|---|---|---|
| Bacteria (various) | Wet, shiny, colored colonies | Very rapid (1-2 days) | Sweetish, putrid | Antibiotics in agar, timely transfers |
| Trichoderma spp. | White hyphae turning green | Rapid (2-4 days) | Earthy, moldy | Isolation, humidity reduction |
| Penicillium spp. | Blue-green, powdery colonies | Medium (3-5 days) | Earthy, characteristic | Improved sterility |
| Aspergillus spp. | Black, yellow, or green colonies | Medium-rapid (2-5 days) | Earthy, mold | Humidity control, air filtration |
Emergency transfer techniques
When a contamination is identified early, it is possible to attempt to save the culture through emergency transfer techniques. These techniques are based on the principle that the desired mycelium generally grows faster than contaminants in the early stages of development, creating a zone of pure tissue that can be isolated and transferred to a new culture medium. The success of these operations depends on numerous factors, including the type of contaminant, the stage of contamination development, and the vitality of the desired mycelium.
The most common technique is the wedge transfer, which consists of taking a small fragment of agar from the most advanced zone of pure mycelial growth, ideally at a distance of at least 1-2 cm from the edge of the contamination. This fragment is then transferred to a new sterile agar plate and monitored carefully to ensure it is completely free of contaminants. Statistically, emergency transfers have a success rate between 40% and 70%, depending on the timeliness of the intervention and the operator's experience.
Long-term preservation of cloned cultures
Once a cloned culture is successfully obtained, the need arises to preserve it over time, maintaining its vitality and genetic characteristics. The long-term preservation of mycelial cultures represents a crucial aspect of mycoculture, both to guarantee the availability of prized strains and to constitute a personal genetic "bank". In this chapter, we will explore the different preservation techniques, from the simplest and most economical to the more advanced, analyzing their principles, advantages, and limitations.
We will start with short and medium-term refrigeration techniques, examining the factors that influence the stability of cultures in the refrigerator. We will then proceed with cryopreservation techniques, which allow for the preservation of cultures for indefinite periods at ultra-low temperatures. We will conclude with lyophilization techniques and preservation in sterile water, two alternative methods particularly suited to specific needs or contexts.
Refrigeration and periodic subculturing
Refrigeration represents the simplest and most accessible method for the short and medium-term preservation of mycelial cultures. At temperatures between 2 and 6°C, fungal metabolism slows drastically, allowing cultures to be preserved for periods ranging from 3 to 12 months, depending on the species and preservation conditions. It is important to use culture media poor in nutrients (like water agar or agar with diluted malt extract) for cultures to be preserved, as substrates that are too rich can favor residual metabolism that consumes the culture's reserves and shortens its useful life.
Periodic subculturing, typically done every 6-12 months, is necessary to maintain the vitality of cultures preserved in the refrigerator. This process consists of transferring a small fragment of vital mycelium to a new culture medium, thus regenerating the stock. It is important to limit the number of successive subcultures for the same strain, as each transfer represents an opportunity to accumulate somatic mutations that can alter the characteristics of the original strain (a phenomenon known as "culture senescence").
Table of refrigeration preservation times for common species
| Species | Preservation medium | Temperature | Maximum duration | Specific notes |
|---|---|---|---|---|
| Agaricus bisporus | Water Agar | 4°C | 6-8 months | Sensitive to drying out |
| Pleurotus ostreatus | Diluted MEA | 4°C | 10-12 months | Robust, tolerates preservation well |
| Lentinula edodes | Sawdust Agar | 2°C | 8-10 months | Prefers lower temperatures |
| Ganoderma lucidum | Standard MEA | 4°C | 4-6 months | Vitality reduced after 4 months |
Cryopreservation and advanced techniques
For long-term preservation (years or decades) without the need for periodic subculturing, cryopreservation represents the technique of choice. This method is based on the immersion of cultures in liquid nitrogen at -196°C, a temperature at which all metabolic and biochemical processes are practically arrested. Cultures can be cryopreserved in different forms: myceliated agar discs, hyphal suspensions in cryoprotectant, or even pieces of fruiting body.
The key to successful cryopreservation lies in the use of appropriate cryoprotectants, substances that prevent the formation of damaging intracellular ice crystals during freezing and thawing. 10% glycerol and 5% dimethyl sulfoxide (DMSO) represent the most common cryoprotectants in mycology. Comparative studies have shown that glycerol generally offers higher survival rates for most higher fungi, with values that can reach 80-90% for well-adapted strains.
Cloning: today it is possible to preserve prized mushrooms.
Cloning from fruiting bodies represents a powerful and accessible technique that allows the mycocultivator to preserve and multiply fungal strains of particular value, guaranteeing genetic stability and predictability of performance. As we have seen throughout this guide, the success of this practice depends on a methodical approach that integrates the understanding of fungal biology, the setup of an appropriate work environment, the careful choice of materials and tools, and the implementation of rigorous sterility protocols.
Despite the inevitable challenges represented by contaminations and the need to maintain controlled conditions, the benefits of cloning in terms of quality and consistency of the final product amply justify the investment in time and resources. With experience and the refinement of techniques, the mycocultivator can achieve success rates approaching 90-95%, transforming what initially may appear as a mysterious art into a reproducible and reliable practice.
Future perspectives and technological developments
The future of mycological cloning appears rich with promise, with the development of increasingly accessible technologies that could further democratize this practice. Among the most interesting trends emerging are: cold plasma sterilization systems, which offer a non-thermal alternative for the decontamination of surfaces and instruments, small-scale bioreactors for the automated production of inoculum, and simplified cryopreservation techniques that will make long-term strain preservation more accessible.
In parallel, the growing availability of low-cost DNA sequencers is opening new frontiers in the genetic characterization of cloned strains, allowing the mycocultivator to verify the identity and purity of their own isolates with a level of precision hitherto unthinkable. These technologies, combined with increasingly sophisticated knowledge-sharing platforms, are contributing to transforming mycoculture from an artisanal practice into a true scientific discipline, accessible to an ever-wider audience of enthusiasts and professionals.
The kingdom of fungi is a universe in continuous evolution, with new scientific discoveries emerging every year about their extraordinary benefits for gut health and overall well-being. From now on, when you see a mushroom, you will no longer think only of its taste or appearance, but of all the therapeutic potential it holds in its fibers and bioactive compounds. ✉️ Stay Connected - Subscribe to our newsletter to receive the latest studies on: Nature offers us extraordinary tools to take care of our health. Mushrooms, with their unique balance between nutrition and medicine, represent a fascinating frontier that we are only beginning to explore. Continue to follow us to discover how these extraordinary organisms can transform your approach to well-being.Continue your journey into the world of mushrooms