


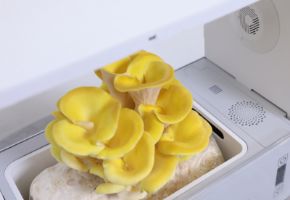


Welcome to this technical deep dive on the integration of Arduino-based environmental control systems within our growing chambers. For the modern mushroom cultivator, precision in governing environmental parameters is no longer optional, but the dividing line between a mediocre harvest and a mycological success.
In this article, we will explore in absolute detail how the Arduino platform, with its flexibility and low cost, can be used to build a professional monitoring and regulation system for the two most critical parameters after temperature: relative humidity and carbon dioxide concentration. Through data, tables, diagrams, and code, we will transform a simple microcontroller into the silent and infallible guardian of our fungal ecosystem.
Arduino: how to use the platform for mushroom cultivation
Before delving into circuits and code, it is essential to understand why Arduino represents a revolution for both hobbyist and professional mushroom growers. Born in Italy, Arduino is an open-source electronic prototyping platform that has democratized access to programmable electronics. Its philosophy is based on accessible hardware, simple development software, and a global support community. For us mushroom growers, this translates into the ability to create tailored tools, capable of reading the environment exactly as our mushrooms perceive it and acting accordingly, outperforming in terms of performance and adaptability many commercial devices at prohibitive costs.
Why choose Arduino for grow room environmental control
The choice of Arduino is not just about cost. Commercial controllers for greenhouses or grow tents are often generic, with preset control logic that is poorly adaptable to the specific and dynamic needs of mushroom cultivation. Mushrooms, like the prized Pleurotus ostreatus or the delicate Agaricus bisporus, have needs that change radically between the incubation, fruiting, and harvesting phases. Arduino allows for programming complex, multi-phase environmental profiles, reacting not only to static thresholds but to temporal trends, ensuring a stability that is key to successful cultivation.
The basic components of an Arduino system
A basic system consists of a few fundamental elements. The Arduino board itself, which acts as the brain. The sensors, which are its eyes and ears in the environment. The actuators, which are its arms, such as relays to control humidifiers or air extractors. Finally, a shield or module for data logging, which allows us to keep a detailed climate diary. The beauty of the system lies in its modularity: starting from basic monitoring, you can grow towards total environmental control, adding sensors for temperature, light, or airflow, all managed by the same central brain at marginal costs.
Scientific fundamentals: why CO2 and humidity are critical for mushrooms
Understanding fungal physiology is not an academic exercise, but the prerequisite for designing an effective control system. Mushrooms are aerobic organisms, consuming oxygen and producing carbon dioxide as a metabolic waste product. However, unlike plants, they do not fix CO2. An accumulation of this gas, especially during the fruiting phase, is not only useless but extremely harmful.
The role of carbon dioxide (CO2) in fungal metabolism
During incubation, the mycelium tolerates fairly high levels of CO2 (up to 10,000 ppm and beyond), which even stimulate aggressive and compact growth. The picture changes drastically in the fruiting phase. CO2 levels above 800-1000 ppm for many edible species begin to inhibit the formation of primordia (mushroom pins) and cause abnormal development of the fruiting body. Mushrooms develop long, thin, and deformed stems, small caps, and in extreme cases, do not fruit at all. This is because carbon dioxide is denser than air and tends to stagnate in the lower layers of the growing chamber, right where our mushrooms are. Monitoring and actively removing it is not a matter of optimization, but of harvest survival.
Table: effects of CO2 concentration on mushroom growth
| CO2 concentration (ppm) | Effect on mycelium / Fruiting body | Recommended actions |
|---|---|---|
| 400 - 800 | Ideal range for fruiting. Development of normally shaped fruiting bodies. | Maintain air exchange to stabilize values. |
| 800 - 1500 | Inhibition of primordia formation. Stem elongation and cap reduction. | Increase ventilation. Check extractor fan efficiency. |
| 1500 - 5000 | Severe deformations ("rosecomb" cap). Arrested development. Excessive aerial mycelium ("overlay"). | Immediate forced ventilation. Possible crop damage. |
| > 5000 | Complete inhibition of fruiting. Possible mycelium distress. | Emergency. Complete air replacement in the environment. |
Relative humidity: the lifeblood of the grow environment
If CO2 is the poison, relative humidity (RH) is the vital water. Mushrooms are over 90% water and lack a closed vascular system; they absorb water directly from the saturated air surrounding them through their cuticle. Insufficient relative humidity leads to excessive evaporation from the fruiting body, causing stunted development, dry and cracked caps, and an overall impoverished harvest. Conversely, excessive and stagnant humidity, especially when combined with poor air circulation, creates the perfect microclimate for bacterial (like bacterial blotch) and fungal (like green mold) contaminations, in addition to creating free water on the substrate that can drown the mycelium.
Maintaining a constant relative humidity between 85% and 95% for most species during fruiting is the Holy Grail of the mushroom cultivator. Fluctuations outside this range are a continuous stress for the fungus and translate directly into a loss of yield and quality.
Sensor selection: in-depth technical guide
The choice of sensor is the most important decision that will determine the long-term reliability of the entire system. A poor sensor provides erroneous data, and a control system, no matter how well programmed, will perform wrong actions based on that data. Let's analyze the available technologies for the two key parameters.
CO2 sensors: technology comparison
There are mainly three technologies for CO2 detection: chemical sensors (low-cost), NDIR (Non-Dispersive Infrared) sensors, and electrochemical sensors. For mushroom cultivation, the only professionally valid choice is NDIR technology.
NDIR sensors work by measuring the absorption of infrared light by CO2 molecules. They are extremely selective (not influenced by other gases), stable over time, and accurate. Their weak point is the cost, higher than chemical sensors, but it is a mandatory investment. An NDIR sensor like the famous MH-Z19B or the Sensirion SCD30 offers a measurement range from 0 to 5000 ppm (or more) with an accuracy of ±(50 ppm + 3% of reading), more than sufficient for our needs. They require periodic calibration, but many modern models have an automatic baseline correction (ABC) that makes them practically "set and forget".
Relative humidity sensors: DHT22, SHT31 and beyond
For humidity, the choice falls on capacitive sensors. The most well-known in the Arduino community are the DHT family (DHT11, DHT22) and the more professional Sensirion family (SHT31, SHT85). The DHT22 is a great starting point: it's cheap, also measures temperature, and has a humidity accuracy of ±2-5%. However, for a top-tier system, the quality jump to a Sensirion SHT31 is significant. The Sensirion SHT31 has a humidity accuracy of ±2%, very low long-term drift, and a faster response to changes. In a vapor-saturated environment, where every percentage point counts, this additional accuracy makes the difference between 92% and 94% humidity, a gap that can influence the mushroom's transpiration.
Table: technical comparison of humidity and temperature sensors
| Sensor model | Humidity range | Humidity accuracy | Temperature range | Temperature accuracy | Interface |
|---|---|---|---|---|---|
| DHT11 | 20-80% RH | ±5% RH | 0-50°C | ±2°C | Digital (proprietary) |
| DHT22 (AM2302) | 0-100% RH | ±2-5% RH | -40 to 80°C | ±0.5°C | Digital (proprietary) |
| Sensirion SHT31 | 0-100% RH | ±2% RH | -40 to 125°C | ±0.2°C | I2C |
| Sensirion SHT85 | 0-100% RH | ±1.5% RH | -40 to 125°C | ±0.1°C | I2C |
Circuit design and wiring
With the sensors chosen, let's move on to the practical realization of the circuit. We will use an Arduino Uno or Mega as the brain, an MH-Z19B sensor for CO2 and a Sensirion SHT31 for humidity and temperature. Actuator control will be done via relay modules.
Schematic for CO2 and humidity monitoring
The schematic is surprisingly simple. The MH-Z19B sensor communicates via UART serial protocol, so it will use the RX and TX pins of Arduino (usually pins 0 and 1, but it's better to use a SoftwareSerial on other pins, e.g., 10 and 11, to avoid interfering with USB communication). The SHT31 sensor uses the I2C bus, which requires connection to the analog pins A4 (SDA - Data) and A5 (SCL - Clock) on Arduino Uno. Both sensors are powered at 5V. The relay modules, which will control the humidifier and extraction fan, will be connected to digital output pins (e.g., D7, D8) and powered at 5V, taking care to electrically isolate the power section (220V for appliances) from the control section (Arduino's 5V) for total safety.
Power supply and isolation considerations
A control system must be reliable 24/7. An interruption of a few minutes can cause a CO2 spike or a humidity crash. It is essential to use a high-quality, stabilized power supply of at least 2A for Arduino and the sensors. For the relays, if controlling powerful loads (like ultrasonic humidifiers of several hundred watts), it is advisable to power the relay module with a separate source and use an opto-isolator to fully protect the delicate Arduino pins from any current spikes or interference from the mains power. The golden rule is: safety first when working with mains voltage.
Arduino programming: the heart of the control system
The code is what brings our hardware to life. It's not just about reading values, but about implementing robust control logic that prevents rapid cycling (continuous on/off switching) of the actuators and can handle sensor error situations.
Reading data from sensors and calibration
The first step is to include the correct libraries (e.g., "MHZ19" for the CO2 sensor and "Adafruit_SHT31" for the humidity sensor) and initialize the sensors in the setup(). Reading the values is then straightforward, but the wisdom lies in error handling. The code should always check if the sensor reading was successful. In case of error, instead of sending a plausible value, it is better to signal a fault and put the system in a safe state (e.g., activate ventilation). For calibration, the MH-Z19B has specific commands via software. Full-scale (zero) calibration should only be performed in an environment with clean air (about 400 ppm), while span calibration by the user is not recommended without specific equipment.
Implementing threshold control logic with hysteresis
The simplest control is ON/OFF threshold control. However, turning a humidifier on at 89% RH and off at 90% would cause premature wear and oscillating humidity. The solution is hysteresis. We will set a different activation threshold and deactivation threshold. For example: turn on the humidifier if RH falls below 88% and turn it off only when it exceeds 93%. This way the actuator does not cycle continuously and the humidity oscillates gently within an acceptable range (88%-93%). The same logic must be applied to CO2 control: activate the extraction fan when CO2 exceeds 900 ppm and turn it off only when it drops below 600 ppm. This simple trick transforms an amateur system into a professional one.
Integration with actuators: humidifiers and air extractors
A monitoring system without control is like a doctor who makes a diagnosis but prescribes no cure. The actuators are the tools with which Arduino acts on the physical world to correct the detected imbalances.
Control of ultrasonic and steam humidifiers
Ultrasonic humidifiers are the most common for small grow chambers. They are efficient and produce a fine, cool mist. They are controlled via a relay that powers their outlet. It is crucial, however, to couple them with an internal circulation fan to distribute the vapor evenly and avoid supersaturated and dry spots. For larger environments, steam humidifiers can be used, which are more energy-intensive but produce a hot, sterile vapor, less prone to carrying contaminants. The control principle via relay is identical.
Management of fans and extractors for air exchange
CO2 control occurs primarily through the forced extraction of stale air and the introduction of fresh air. Axial or centrifugal fans are used, always controlled via relays. An advanced strategy involves using two relays: one for a powerful extraction fan and one for a smaller intake fan, creating a slight positive pressure to prevent the entry of spores from the outside. In very dry climates, the incoming air might lower the humidity; in this case, Arduino's control logic must be intelligent enough to compensate by activating the humidifier simultaneously with the extraction, maintaining a perfect balance between the two antagonistic parameters.
Data collection, logging and visualization
Data is the treasure of the mushroom cultivator. A detailed environmental log allows us to correlate growing conditions with final results, optimizing recipes for subsequent cycles.
Using SD cards for data logging
Adding an SD card shield to Arduino allows saving CO2, humidity, and temperature data with a timestamp (date and time) to a text file. Just one reading per minute creates an extremely valuable dataset. A CSV file (Comma-Separated Values) with columns for "Timestamp", "CO2_ppm", "Humidity_%", "Temperature_C" can then be opened and analyzed with any spreadsheet software, like Microsoft Excel or Google Sheets, to produce charts and statistics.
Simple user interfaces: LCD displays and serial output
For immediate feedback, a 16x2 LCD display connected via I2C is the ideal solution. It shows the critical values in real time and the status of the actuators (e.g., "HUMID: ON", "FAN: OFF"). During development and debugging, the serial monitor integrated into the Arduino IDE is an extremely powerful tool, allowing you to print all data and debug messages, letting us "see" what our microcontroller is thinking.
Maintenance, calibration and troubleshooting
No electronic system is "set it and forget it". Scheduled maintenance is the key to years of reliable service.
Periodic sensor calibration
The SHT31 sensor is very stable, but it can be useful to check it periodically (every 6-12 months) with a calibrated reference hygrometer. For the MH-Z19B, the ABC (Automatic Baseline Correction) calibration cycle is usually sufficient. This algorithm assumes that the sensor, over a period of about 24 days, is exposed to air with 400 ppm CO2 for at least 20 consecutive minutes. If our grow chamber is always saturated with CO2, it might be necessary to physically take the sensor outside periodically to allow for this correction, or disable the ABC and perform a manual zero calibration in an outdoor environment.
Troubleshooting common issues
The most frequent problems are: "erratic sensor readings" (check wiring and power supply), "actuators not activating" (check the relay and the signal from the digital pin with a test LED), "measurement drift" (time for a calibration). Having a spare sensor for a comparison test is the best strategy to diagnose a faulty sensor with certainty.
Beyond the basics: advanced projects and integration with home assistant
Once the basic system is mastered, the world is your oyster. We can expand the functionality in many ways.
Wi-Fi control and smartphone notifications
By replacing Arduino with an ESP32 (compatible with the Arduino IDE but with built-in Wi-Fi), we can publish data to an internal web server. We can program the sending of push notifications to our smartphone when parameters go outside the safe range, allowing us to intervene promptly even remotely.
Integration into a home automation system: home assistant
The Holy Grail is integration into a home automation system like Home Assistant. By connecting our Arduino/ESP32 via MQTT (a messaging protocol for IoT), we can visualize data on elegant dashboards, create complex automations (e.g., "If CO2 exceeds 1000 ppm for more than 10 minutes, increase fan speed by 50%") and integrate grow room control with other house systems, like lighting or general climate control. This represents the highest level of control and automation for the modern mushroom cultivator.
Arduino for optimal cultivation control
Building an Arduino-based environmental control system for mushroom cultivation is an extremely rewarding journey that combines the passion for mycology with that for technology. It's not just about saving money, but about acquiring uncompromising control over the production process, understanding the needs of our mushrooms to the fullest, and collecting valuable data to improve cycle after cycle.
Starting from the basics described here, every mushroom cultivator can build the perfect tool for their specific needs, scalable and modifiable infinitely. It is an investment in knowledge that pays back with abundant interest in the form of abundant, healthy, and high-quality harvests.
Continue your journey into the world of mushrooms
The kingdom of fungi is a universe in constant evolution, with new scientific discoveries emerging every year about their extraordinary benefits for gut health and general well-being. From now on, when you see a mushroom, you will no longer think only of its taste or appearance, but of all the therapeutic potential it holds in its fibers and bioactive compounds.
✉️ Stay Connected - Subscribe to our newsletter to receive the latest studies on:
- New research on mushrooms and the microbiota
- Advanced home cultivation techniques
- Insights into lesser-known species
Nature offers us extraordinary tools to take care of our health. Mushrooms, with their unique balance between nutrition and medicine, represent a fascinating frontier we are just beginning to explore. Keep following us to discover how these amazing organisms can transform your approach to well-being.