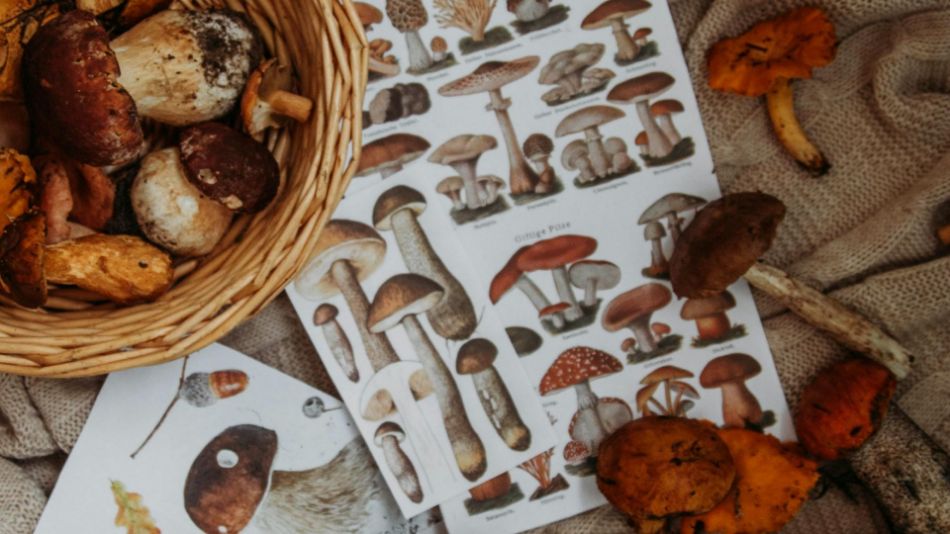
In mycological practice, the herbarium represents a fundamental tool just as the microscope does for a biologist. This technical guide will take you on an in-depth journey into creating a scientific collection of dried mushrooms, a process that combines the art of preservation with the methodological rigor of research.
According to data from the Global Biodiversity Information Facility, fungal herbaria preserve valuable information on approximately 1.2 million different species, constituting an irreplaceable archive for taxonomic, biogeographic, and climate change studies.
Through this guide, you will discover not only basic techniques but also professional secrets used by the world's major herbaria, such as those at the Royal Botanic Gardens, Kew and the New York Botanical Garden, with which I've had the privilege to collaborate during my mycological career.
The scientific importance of mycological herbarium
Before diving into practical techniques, it's essential to understand the intrinsic value of these collections. A well-made herbarium is not merely a collection of natural curiosities but a true three-dimensional database of biological information.
The role of herbarium in modern research
A 2022 study published in Mycological Progress revealed that:
| Application | Percentage of studies using herbaria | Concrete examples |
|---|---|---|
| Taxonomic identification | 92% | Description of new species |
| Biogeographic studies | 78% | Distribution patterns |
| Historical research | 65% | Changes in biodiversity |
| Molecular analyses | 41% | DNA extraction from historical specimens |
Technical Note: Recent advances have demonstrated the possibility of extracting usable DNA from specimens dried up to 150 years ago, opening new frontiers for historical fungal population genetics (source: Nature Scientific Reports).
Advanced specimen collection techniques
The collection phase represents the most critical moment in creating a quality herbarium. A mistake at this stage will irreparably compromise the scientific value of the specimen.
Optimal collection protocol
Here's the procedure I've developed over 15 years of field research, adapting protocols from the Kew Fungarium to Mediterranean conditions:
- Preliminary documentation: take at least 3 photos of the specimen in situ (top view, side view, and habitat)
- Complete collection: extract the mushroom with the entire stem and base, possibly digging with a knife
- Immediate separation: place each specimen in separate rigid containers (never plastic bags)
- Field annotations: immediately record:
- GPS coordinates (accuracy ≤5m)
- Exact substrate (e.g., "Quercus ilex, decaying wood")
- Odor and features not visible after drying
Technical collection data
| Fungus type | Temperature 4°C | Temperature 20°C | Morphological degradation |
|---|---|---|---|
| Fleshy Agaricales | 12-18 hours | 4-6 hours | Pileus collapse, color loss |
| Polypores | 48-72 hours | 24-36 hours | Irregular dehydration |
| Delicate Ascomycetes | 6-8 hours | 2-3 hours | Loss of fertile structures |
Professional drying technologies
Drying is the process that transforms a fresh specimen into a stable long-term record. Modern techniques combine physical principles with technological innovations.
Comparison of drying methods
| Method | Temperature | Time | Residual moisture | DNA preservation | Cost |
|---|---|---|---|---|---|
| Traditional press | Ambient | 7-14 days | 8-12% | Moderate | € |
| Ventilated dryer | 40-45°C | 24-48h | 5-7% | Good | €€ |
| Freeze-drying | -50°C | 72h | 1-3% | Excellent | €€€€ |
| Silica gel | Ambient | 5-7 days | 3-5% | Good | €€ |
Technical Data: Research conducted at the Harvard University Herbaria shows that drying at 42°C with controlled ventilation preserves up to 93% of microscopic structures compared to 78% with traditional methods.
Optimized drying protocol
Based on guidelines from the New York Botanical Garden, with modifications for small collections:
- Pre-drying: 2 hours at 30°C to reduce thermal shock
- Active phase: 36-48 hours at 42±2°C with air circulation
- Gradual cooling: Reduce temperature by 5°C/hour until room temperature
- Stabilization: 24 hours in turned-off dryer with silica gel
Professional mounting techniques
Mounting transforms a dried specimen into a museum-quality exhibit, balancing conservation needs with educational purposes.
Comparison of archival materials
| Material | Estimated lifespan | Insect resistance | Dimensional stability | Cost per sheet |
|---|---|---|---|---|
| 100% cotton cardstock | 200+ years | High | Excellent | €€€ |
| Alpha-cellulose board | 100-150 years | Medium | Good | €€ |
| Standard cardstock | 30-50 years | Low | Fair | € |
Step-by-step mounting guide
- Backing preparation: 30x45 cm cardstock (international standard size)
- Placement: leave 5 cm from bottom edge and 3 cm from sides
- Attachment: vinyl glue dots pH 7.5-8.5:
- 1-2 dots on the cap
- 1 dot on the stem
- Optional dot at the base
- Protection: polypropylene sheet heat-sealed at edges
Professional Advice: for valuable collections, consider using UV barriers (such as museum glass with UV99% filter) for display, following standards from the Mycological Society.
Toward a 21st century herbarium
Creating a herbarium today means integrating tradition and innovation. Modern digital techniques offer unprecedented possibilities:
- 3D scanning at high resolution (up to 10 microns)
- Augmented reality to reconstruct original colors and shapes
- Shared databases like MyCoPortal
- Non-destructive spectral analysis
A well-made herbarium thus becomes a bridge between past and future, preserving biological memory for generations to come while embracing tomorrow's technologies.
The fungal kingdom is a universe in continuous evolution, with new scientific discoveries emerging every year about their extraordinary benefits for gut health and overall well-being. From now on, when you see a mushroom, you will no longer think only of its taste or appearance, but of all the therapeutic potential it holds in its fibers and bioactive compounds. ✉️ Stay connected - Subscribe to our newsletter to receive the latest studies on: Nature offers us extraordinary tools to take care of our health. Fungi, with their unique balance between nutrition and medicine, represent a fascinating frontier we are only beginning to explore. Continue to follow us to discover how these extraordinary organisms can transform your approach to well-being.Continue your journey into the world of fungi


